How to Accept Crypto Payments on Your Website (2026 Guide)
Learn how to accept crypto payments on your website step-by-step using a non-custodial gateway, zero percentage fees, and instant on-chain settlement.
Do this next
Accept crypto for your own sales
- Tax the supply in local currency at the tax point.
- Licensing usually follows custody, not invoicing.
- Keep a per-invoice fiat figure at settlement.
To accept crypto payments on your website: pick a gateway that settles to a wallet you control, configure which assets and chains you accept, add a hosted payment link or embedded checkout, test on testnet, and connect webhooks so paid orders update automatically. Settlematic does this without percentage fees or custody of your funds.
TL;DR
To accept crypto payments on your website, choose a non-custodial gateway like Settlematic, configure destination wallets, integrate an embedded checkout or hosted payment link, test transactions in a sandbox environment, and automate accounting reconciliation via webhooks without paying percentage-based processing fees.
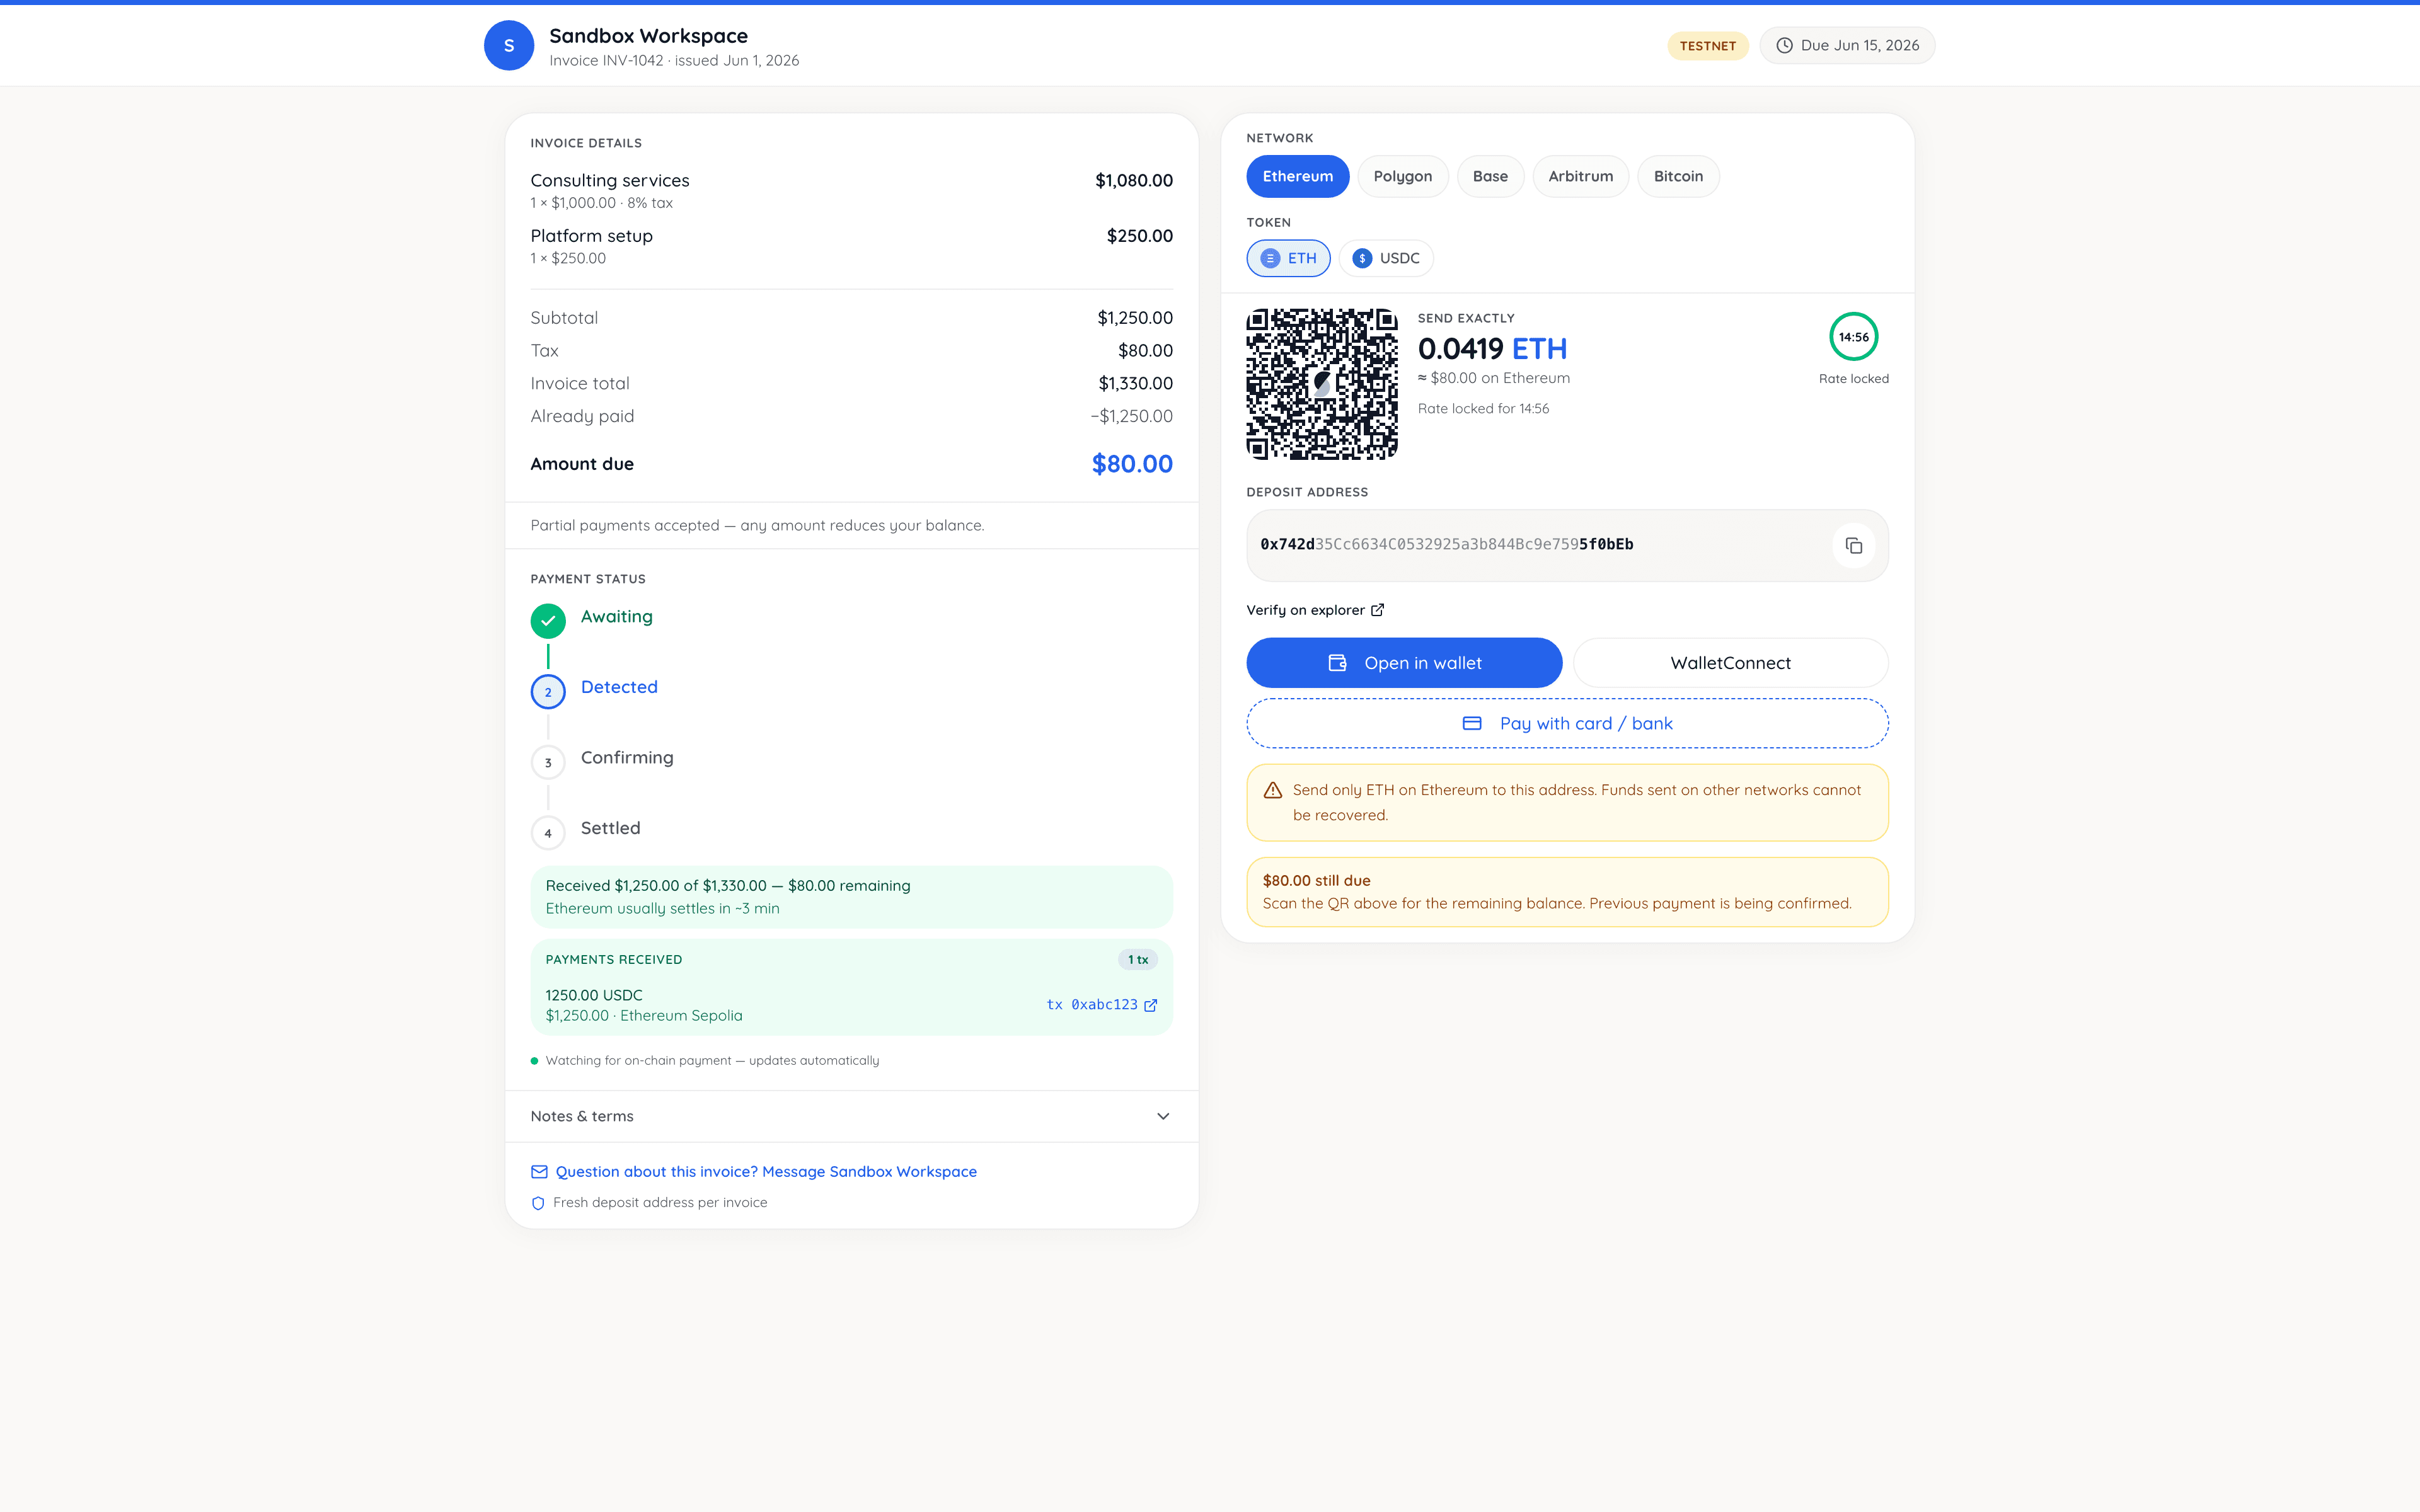
To accept crypto payments on your website, choose a non-custodial gateway like Settlematic, configure destination wallets, integrate an embedded checkout or hosted payment link, test transactions in a sandbox environment, and automate accounting reconciliation via webhooks without paying percentage-based processing fees.
Accepting cryptocurrency on your website has evolved from an experimental feature for Web3 native projects into a standard payment option for global SaaS platforms, digital agencies, e-commerce stores, and cross-border service providers. By enabling crypto checkout, merchants eliminate cross-border wire delays, avoid credit card chargebacks, and reduce payment processing fees from 3.5% down to zero percentage take-rate.
However, traditional payment gateways often impose custodial risks—holding your revenue on internal ledgers for days, charging 1% to 2% per transaction, or freezing merchant accounts during compliance reviews. In this guide, we walk through the step-by-step process of integrating a true non-custodial payment flow into your website, ensuring funds settle directly to wallets you control.
Step 1: Choose a non-custodial crypto payment gateway
The first decision is selecting between a custodial processor and a non-custodial gateway. Custodial processors like BitPay hold customer funds on central ledgers before executing daily batch payouts to bank accounts. This introduces counterparty risk, withdrawal delays, and minimum settlement thresholds. For a detailed architecture breakdown, read our guide on non-custodial crypto payment gateways.
Settlematic operates as a true non-custodial gateway. When a checkout session is initiated on your website, Settlematic derives a unique deposit address cryptographically bound to your designated settlement wallet. Settlematic never holds private keys, cannot freeze funds, and does not retain a percentage of your volume. Pricing is structured as a flat monthly subscription—Gateway on the Pro plan costs $49/month with zero per-transaction fees.
- Supported Assets: USDC, USDT, EURC, ETH, BTC.
- Supported Blockchain Networks: Ethereum, Polygon, BSC, Solana, Tron, Bitcoin (6 chains).
- Custody Model: True non-custodial with address-bound settlement at issuance.
- Pricing Model: Flat $49/mo subscription on Pro plan; zero percentage take-rate.
Step 2: Connect settlement wallet destinations
Before issuing payment addresses to website visitors, you must configure where incoming crypto should be delivered. Settlematic allows you to define labeled settlement destinations per chain and asset (for example, sending Polygon USDC to an operational wallet and Ethereum ETH to a multisig cold wallet).
When an address is derived for a website checkout session, Settlematic uses BIP-84 or CREATE2 counterfactual address binding. Watch-only blockchain indexing nodes monitor the network for incoming transactions. Once confirmed, the funds reside in your self-custody wallet immediately—there is no 'payout request' or batch transfer step required.
Step 3: Choose your checkout integration method
Depending on your technical setup and website architecture, you can integrate crypto checkout using three primary implementation patterns:
| Integration Method | Best For | Setup Effort | User Experience |
|---|---|---|---|
| Hosted Payment Link | Simple invoices, custom quotes, email billing | Low (No code required) | Redirects client to hosted Settlematic checkout URL |
| Embedded Iframe / Modal | E-commerce carts, SaaS checkout pages | Medium (JavaScript widget) | Keeps shopper on your site inside a branded payment modal |
| REST API Integration | Custom checkout logic, mobile apps, Web3 platforms | High (Backend developer needed) | Full UI customization with backend webhook reconciliation |
For custom web application builds, consult our technical walkthrough on crypto checkout API integration to inspect code samples for backend session creation and frontend event handling.
Step 4: Implement fiat-quoted pricing
One common merchant concern is managing cryptocurrency price volatility. Operating a business in volatile tokens like BTC or ETH makes financial accounting difficult if prices swing during checkout.
Settlematic solves this with fiat-quoted pricing. You list products or services on your website in USD, EUR, or GBP. When a user opens the checkout modal, Settlematic fetches real-time market exchange rates and locks the exact crypto payment amount (e.g. 100.00 USDC or 0.038 ETH) for a 15-minute validity window. If the payment arrives within the rate-lock window, the invoice automatically converts to PAID status.
Step 5: Test the checkout flow in the sandbox
Never deploy payment infrastructure directly to production without thorough testnet verification. Settlematic provides a full developer sandbox environment where you can test website checkout flows using testnet tokens (such as Sepolia ETH or Polygon Amoy USDC).
- Generate test API keys in Settings → API keys.
- Create test checkout sessions using your staging backend.
- Simulate payment confirmation and verify webhook payload delivery.
- Ensure your website database updates order status from PENDING to PAID upon receiving payment.confirmed events.
You can explore the test environment anytime by starting a free trial or trying the interactive demo.
Step 6: Automate reconciliation and webhooks
Once a customer completes on-chain payment on your website, your application backend needs real-time notification to grant access, release digital downloads, or mark physical orders as ready to ship.
Settlematic dispatches real-time HTTPS webhooks for critical payment lifecycle events: payment.detected, payment.confirmed, and invoice.paid. Each webhook payload includes transaction hashes, exact chain IDs, token contract addresses, and dollar-equivalent values. This data seamlessly flows into accounting systems or ERPs, removing manual wallet checking.
Comparing custodial vs. non-custodial website processors
To highlight why architecture matters when accepting payments on your website, consider the structural differences between custodial processors and Settlematic's non-custodial model:
| Feature | Custodial Processors (e.g. BitPay) | Settlematic Gateway |
|---|---|---|
| Processing Fee | 1% – 2% + $0.25 per transaction | Flat $49/mo subscription (0% per transaction) |
| Fund Hold Period | 1 to 3 business days on processor ledger | Instant on-chain settlement to your wallet |
| Account Freeze Risk | High (funds can be frozen during review) | Zero (Settlematic never holds private keys) |
| Customer Wallet Requirements | Restricted to supported partner wallets | Universal (Any wallet, QR code, or WalletConnect) |
| Supported Chains | Selected multi-coin networks | Ethereum, Polygon, BSC, Solana, Tron, Bitcoin |
Ready to add crypto checkout to your website?
Integrating crypto payments on your website does not require giving up control of your funds or handing over 2% of your revenue to a processor. With Settlematic Gateway, you get developer-friendly APIs, non-custodial wallet settlement, and zero percentage processing fees.
Test your integration risk-free in our developer sandbox today. Visit the demo or view our pricing plans to launch non-custodial crypto payments on your website.
Sources
Frequently asked questions
- Do customers need a specific wallet to pay on my website?
- No. Customers can pay using any crypto wallet by scanning a QR code or copying the deposit address, or by connecting an EVM browser wallet via WalletConnect.
- Does accepting crypto payments require custody of funds?
- Not with a non-custodial gateway. Settlematic cryptographically binds each payment address to your wallet at issuance, so funds settle directly to your cold storage or operating wallet without an intermediary holding balance.
- How do I prevent underpayment issues caused by price volatility?
- By accepting fiat-quoted stablecoins (USDC, USDT, EURC) or enforcing short rate-lock windows (e.g. 15 minutes) for volatile assets like BTC and ETH.
- What transaction fees apply when accepting crypto on my website?
- Settlematic charges flat subscription pricing starting at $49/mo on Pro with zero percentage fees. Customers pay standard on-chain network gas fees when sending transactions.
- Can I test the checkout flow without real crypto funds?
- Yes. Settlematic provides a full testnet sandbox where you can generate test API keys, simulate checkout sessions, and test webhook triggers without spending real crypto.